How To Select Shapes In Ms Visio 2019
January 8, 2021 2022-05-26 13:47How To Select Shapes In Ms Visio 2019
How To Select Shapes In Ms Visio 2019
It’s time to see the different ways that we have to select our shapes no matter how many shapes we have to work with. For Example: Move it out of the way a little bit further to the right-hand side here in line with the other ones. We are going to select a couple of shapes. First, we’re going to see all of them. Commanding Ctrl-A means all shortcuts and doing this will allow you to see that in one click on the keyboard.
How to Find Visio Shapes Size
Tricks to Select, Resize & Move Shapes
We have selected all the shapes and if we decide to move them we can move all at once. We could also decide to resize them all at once and we’re going to end up on other pages because we have that option set. We are going to see that at a later stage.
So, we have them back to the original size and we’re going to hit escape to the selector. Now we’re going to see that if we want to select only these three shapes here. We could left click and drag, but we need to make sure that we select all the shapes from the outside.
While releasing, we can see that we didn’t select any shapes at all, so left click and drag will make sure that we have them all. It doesn’t matter if we go over this Way as long as we have them all in. We can see that we have selected these three shapes, and they are all together grouped at the moment.
So, we can see we move them. We can resize them again just like we have done previously all at once. We don’t Ctrl Z to undo and to escape. We have deselected them if we wanted to select a couple of shapes that are not next to each other directly.

How To Select Shapes In Ms Visio 2019 while Using Shortcut Keys
Starting with the circle and the triangle, we are going to left-click and drag. So, we can see the shape of the cursor that has changed, and we are going to select the triangle below and go back up. We release the left click, and we can see that we have the circle highlighted. The triangle is highlighted, and we don’t have the rectangle. If we left-click and drag, we can see only these two shapes have been selected.
We could select the first shape and hit the Ctrl button, and select the second shape. Now we can see that we have the handles of the box all over our three shapes. But if we look correctly, we can see that we have a blue highlighted border around these two shapes.
Nothing in the middle means that we have only these two shapes selected. If we’re going to left-click on the border and drag we can see that we move only these two Shapes. This one wasn’t selected, so we do a Ctrl Z to go back, and this is to select shapes. We can select as many as we want with the Ctrl Key. We could go to the home tab.

Explore Editing Group Feature
Now we are going to the editing group in order to understand how to select Visio format shapes size. Here we can see that we have selected all the shortcut keys. We have used Ctrl-A, and we selected all the shapes that are on a page.
Then we have shapes, or even dialog boxes that will be on the page. So, we have to keep that in mind, and we have to select by type. The select by type will open a different dialog box. We are going to select it just briefly.


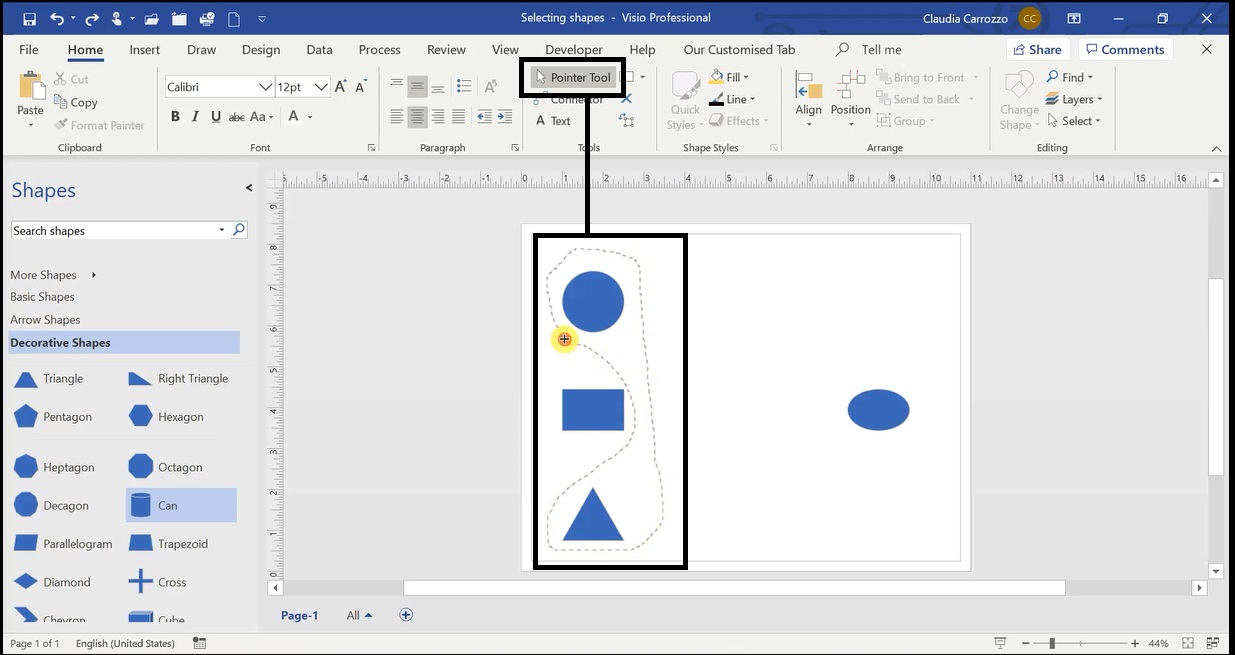
We can see that it will be used even specifically with certain shapes. We will see that later and even by layers. Now we’re going to cancel it because you have an idea of what it looks like. We go back into the selected command. We have an area selected, which is the one we have used. Also by left-clicking and dragging a rectangle around the shapes we want to select them. We have a lasso selection now. We are going to select this lasso selector. We can also, with the lasso selector, select shapes that are not next to each other.

With the lasso selector we can hit the Ctrl Z a couple of times, and we go back to where we have selected the lasso tool. To get out of this mode, we both go and hit the Ctrl number one; we go to the tools group. We can see that we have a pointer tool.

We can either click here or do control number one, and we will be back into the Normal point mode. If we left-click and drag, nothing happens here. This is how you can select Visio format shape size. Next, we’ll see how to insert shapes with a couple more tricks.


