How To Autofill In Excel
November 2, 2020 2022-05-26 9:04How To Autofill In Excel
How To Autofill In Excel
Excel’s Autofill feature can be utilized in several circumstances.
Excel has an Autofill feature that will enter data based on a pattern versus entering each cell manually. The Autofill feature is turned on by default in Excel, however, if it has been turned off, go to File Tab and select Options.
In the Advanced menu, make sure to Enable Auto-complete for Cell Values that have been checked. If for some reason, you do not want Excel to Autofill values, unchecked the box and this feature will be turned off.

- Excel will recognize a value you have already entered within another cell and will suggest that same value when you begin typing the first few characters.
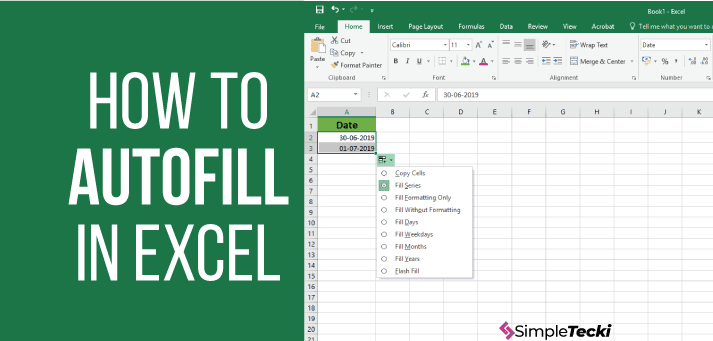
- Using the drag fill can fill data across rows or down columns.
- The Fill command will also fill data across rows or down columns.
- Recognize a pattern and complete the series of data.
Recognizing a previously entered value
In the example to the right, Expense was entered into cell B1 and when “E” was entered into B2, Excel recognized the possible value and suggested the same value to be entered. To accept this value, you can either click Tab to move the cell immediately to the right or hit Enter to move down a row.
To deny this value, simply keep typing into the cell or use backspace to delete the data entered.

Drag Fill
In the previous example, all accounts listed in Column A are Expenses, and to quickly fill in Column B, you can use the drag fill option. Notice the green outline around cell B2, grab the bottom right-hand corner of the cell, click and hold down the left button on your mouse and drag the cursor down to Row 4.
This will automatically fill each cell with Expense. Another option is to simply double-click on the bottom right corner of the cell and all cells in Column B will be filled as long as there is data within the adjacent cell in Column A.

To drag and fill across rows, grab the bottom right-hand corner of the cell, click and hold down the left button on your mouse and drag the cursor across the row.
In this example, Office Rent is always $850.00 per month, so we can drag it across each Month to Autofill across the row. The selected cells are outlined in green until you release the mouse button and the selected area will have $850.00 in each cell.
Fill Command

The Fill command is in the Home Tab, within the Editing Box. Highlight the cells that you want to Autofill, click on the Fill Command Button and a menu will display asking if you want to Autofill Down, Right, Up, or Left. To fill only one cell with data from the cell to the left, click the empty cell, click the Fill Command, and select Right.
Recognizing a Pattern
Excel needs at least two cells of data filled in to establish a pattern. In our example, January through March has been filled into Row 1, we want to continue the series and Autofill the remainder of the months across Row 1. Highlight January (B1) and February (B2).

Click the bottom right-hand corner of cell B2 and holding down the mouse button drag the cursor across Row 1. You will notice that as you drag across each cell the Autofill value for that cell appears just under the cursor in a gray box. In the example above, Column G will be June.
Release the mouse button and each month will be entered chronologically. Excel will recognize linear patterns (1,2,3,4,5), growth patterns (multiplies the data), and date patterns (day, weekday, month, or year). To specify the pattern or series you want to Autofill, select the Fill Command and click Series.
The following dialog box will be displayed. In this box, you can select whether you want the series displayed in across a row or down a column.
The type of series, where linear will increase the value by the Step value in this instance the values will increase by 1. Growth Type will multiply the value by the Step Value. Selecting Date will unlock the Date unit box where you can then select Day, Weekday, Month, or Year. You can enter a Stop Value to say when the series will end. For example, entering a Stop Value of 50 will fill each cell across a row from 1 to 50.

Related Posts


